Tag: home

How to Create a Home “Drop Zone” That Reduces Clutter
Clutter often gathers near entry points. Shoes pile up. Bags land on chairs. Mail spreads across counters. These items do not belong in the middle of your living space, yet they arrive there daily. A home “drop zone” offers a practical solution. It creates a designated area for everyday belongings the moment you walk in. When designed well, it reduces visual mess and saves time. Instead of chasing misplaced keys or sorting through stacks of paper, you know exactly where everything goes.
Define the Purpose of the Space
Before buying storage bins or hooks, decide what your drop zone needs to handle. Think about what enters your home most often. Backpacks, work bags, jackets, umbrellas, and mail are common items. List them mentally. This step prevents overdesigning. A drop zone should solve real problems, not become another cluttered corner. If you live in a small apartment, your setup may be compact. If you have a busy family, it may require multiple compartments. The design should reflect daily routines. When the purpose is clear, the layout becomes more focused and effective.
Choose the Right Location
The best location is close to the main entrance. It can be a hallway, mudroom, or even a section of the kitchen wall. The goal is convenience. If the space is too far from the door, people will ignore it. Observe traffic flow. You want enough room to move comfortably. Avoid blocking doors or walkways. Even a narrow wall can work with thoughtful planning. A simple bench and wall-mounted storage can transform a small area into a functional station. Visibility also matters. A drop zone should be easy to spot. This helps ensure everyone uses it consistently.
Install Practical Storage Solutions
Hooks are essential. They hold bags, coats, and hats without taking up floor space. Install them at different heights if children are involved. Lower hooks encourage independence. Add shelves or cubbies for items that cannot hang. Baskets keep smaller belongings contained. Closed cabinets create a cleaner look, while open shelves offer quick access. Choose what fits your lifestyle. A slim console table can serve as a landing surface for keys and mail. If space allows, include a small drawer for items that should stay out of sight. The combination of vertical and horizontal storage supports organization without overwhelming the area.
Add Personal Touches for Motivation

Function comes first, but design still matters. A tidy space feels inviting when it reflects your style. Choose colors and materials that complement your home. Add a small mirror for quick checks before leaving. Label baskets or cubbies for each family member. Personalization creates accountability. It also reduces confusion about where items belong. Keep decoration minimal. The purpose is organization, not display. A calm and cohesive look makes the area feel intentional rather than improvised.
Create a System for Mail and Paper
Paper clutter spreads quickly. Bills, flyers, and school notices pile up in days. A dedicated mail sorter prevents this buildup. Wall-mounted organizers save surface space. Labeled trays help separate urgent items from junk mail. Set a routine for processing paper. Discard unwanted mail immediately. File important documents weekly. The drop zone should act as a temporary stop, not permanent storage. Keep a small recycling bin nearby. This simple addition reduces the chance of paper drifting into other rooms.
Include Seating and Shoe Storage
Shoes often create the most visible mess. A bench with built-in storage solves two problems at once. It offers a place to sit while removing footwear and hides shoes underneath. If built-in benches are not possible, use a narrow shoe rack. Limit the number of pairs stored in the drop zone. Seasonal rotation helps manage space. Comfort encourages use. When it feels easy to remove shoes and store them properly, habits form naturally. Over time, this small change makes a noticeable difference in cleanliness.
Maintain Consistency Through Routine
Even the best setup fails without daily habits. Encourage everyone to use the drop zone immediately upon entering. Place reminders at eye level if needed. Consistency builds order. Schedule a weekly reset. Return misplaced items to their proper spots. Remove anything that does not belong. This routine takes only a few minutes but preserves the system. Reevaluate the setup every few months. If certain items accumulate, adjust storage. Flexibility keeps the space functional as routines change.
A well-designed drop zone reduces clutter by giving everyday items a clear home. By defining its purpose, choosing a strategic location, installing practical storage, and maintaining simple routines, you create a space that supports organization. Small adjustments near the entrance can transform how your home feels. Instead of chaos greeting you at the door, you walk into order. Over time, this structure saves effort and promotes a calmer environment.…

Beginner’s Guide to Starting an Indoor Herb Garden at Home
Growing fresh herbs at home is one of the simplest and most rewarding ways to bring greenery into your living space. Whether you have a spacious kitchen or a small apartment, an indoor herb garden can provide you with fresh flavor year-round and add beauty to your home. For beginners, it may seem a little intimidating at first, but with the right setup and a few basic tips, anyone can enjoy the benefits of growing herbs indoors.
Pick Easy-to-Grow Herbs

If you are just starting, it is best to choose herbs that are hardy and low maintenance. Some of the easiest herbs to grow indoors include basil, mint, chives, parsley, oregano, and thyme. These herbs not only grow well in containers but also add variety to your meals. Start with a few that you use regularly in cooking so you get the most use out of your garden.
Choose the Right Location
Light is the most important factor for growing healthy herbs indoors. Most herbs need at least six hours of direct sunlight each day. A south-facing window is ideal, but if your home does not receive that much natural light, you can use LED grow lights to supplement. Make sure your herbs are placed in a warm spot with good air circulation, but away from cold drafts or heating vents.
Use the Right Containers and Soil

Herbs grow best in pots with drainage holes to prevent water from sitting at the bottom and causing root rot. You can use individual pots for each herb or plant several in a single container, as long as each plant has enough space. Choose a high-quality potting mix that drains well. Avoid using garden soil, which may be too heavy and compact for indoor pots.
Water Properly
Overwatering is one of the most common mistakes in indoor gardening. Most herbs prefer soil that is slightly moist but not soggy. Allow the top inch of soil to dry out between waterings. Stick your finger into the soil to check for moisture, and only water when needed. Mint and basil may need more water than others, so keep an eye on their leaves for signs of drooping or wilting.
Harvest With Care

Regular harvesting encourages your herbs to grow fuller and bushier. When picking leaves, always start from the top and never remove more than one-third of the plant at a time. Use clean scissors or your fingers to snip just above a leaf node, which will encourage new growth from that point. Frequent harvesting helps keep the plants healthy and productive.
Starting an indoor herb garden is a practical and enjoyable way to grow your fresh ingredients. By choosing the right location, selecting beginner-friendly herbs, using proper containers and soil, and giving your plants the care they need, you can create a thriving indoor garden. With a little patience and attention, your home can become a source of flavor, fragrance, and greenery all year long.…

Common Pitfalls of Roofing Warranties and How to Avoid Them
So, you’ve just had a shiny new roof installed, complete with a warranty promising peace of mind and protection against unexpected mishaps. Sounds like a dream come true, right? Well, hold onto your hard hat, because roofing warranties can sometimes be as tricky as balancing on a steeply pitched roof during a windstorm. In this down-to-earth guide, we’ll dive into the top four pitfalls of roofing warranties and how you can sidestep them like a seasoned tightrope walker.
And remember, when in doubt, consulting with your trusted Local Roofer can provide valuable insights and guidance tailored to your specific roofing needs. Let’s unravel these warranty mysteries together!
The Installation Debacle
Picture this: you’ve spent your hard-earned money on a top-of-the-line roofing system with all the bells and whistles. But wait – it turns out the warranty is as flimsy as a house of cards because the installation needed to be better. Whether it’s shoddy artistry, improper materials, or shortcuts taken by the roofing crew, a botched installation can spell disaster for your warranty coverage. To avoid this pitfall, do your homework before hiring a roofing contractor. Look for companies with a track record of quality work and satisfied customers.
The Act of God’s Exemption
Ah, the classic “act of God” clause – the get-out-of-jail-free card that insurance companies love to wield like a shield against claims for damage caused by natural disasters. While it’s true that some events, such as hurricanes, tornadoes, or earthquakes, may be beyond anyone’s control, it’s essential to understand how these acts of God affect your roofing warranty. Many warranties exclude coverage for damage caused by extreme weather events or “acts of nature,” leaving homeowners feeling like they’ve been left out in the rain without an umbrella. To avoid this pitfall, consider supplementing your roofing warranty with additional insurance coverage tailored to protect against natural disasters.
The Fine Print Fiasco

Ah, the dreaded fine print – that sneaky little clause lurking at the bottom of the warranty document, just waiting to rain on your parade. Many homeowners fall into the trap of not thoroughly understanding the terms and conditions of their roofing warranty, only to discover later that certain exclusions or limitations leave them high and dry when they need coverage. To avoid this pitfall, grab a cup of coffee (or a strong magnifying glass) and dive headfirst into that fine print.
The Transfer Trap
So, you’ve decided to sell your home and pass the torch (or the roof?) onto the next lucky homeowner. But wait – it turns out your roofing warranty isn’t transferable, leaving the new owners high and dry regarding coverage. Many warranties have strict limitations or fees associated with transferring coverage to a new owner, leaving both buyers and sellers feeling like they’ve been taken for a ride on a leaky roof. To avoid this pitfall, check the transferability clause of your roofing warranty before putting your home on the market.…

Top Techniques for Soundproofing Your Home on a Budget
Soundproofing your home is essential for creating a peaceful and comfortable environment free from unwanted noise disturbances. While professional soundproofing solutions can be costly, there are several budget-friendly techniques that you can implement to reduce noise transmission within your living space effectively. This guide will explore the top techniques for soundproofing your home on a budget to help you achieve a quieter living environment.
Seal Gaps and Cracks
One of the most effective and affordable ways to soundproof your home is by sealing gaps and cracks in walls, windows, and doors. Sound can easily travel through these openings, so you can significantly reduce noise transmission by filling them with weatherstripping, caulk, or foam sealant. Pay close attention to areas around windows and doors, electrical outlets, and baseboards, as these are common culprits for sound leaks.

Rearrange Furniture and Add Rugs
Strategic placement of furniture and area rugs can also help reduce noise transmission within your home. Furniture such as bookshelves, couches, and cabinets can act as sound barriers, absorbing and deflecting sound waves to minimize echoes and reverberations. Placing area rugs on hard floors can help dampen impact noise and footsteps and reduce sound reflections. Additionally, soft furnishings like cushions and upholstery can enhance sound absorption in your living space.
Use Soundproof Curtains or Blankets

Another cost-effective way to soundproof your home is by using soundproof curtains or blankets. These specially designed curtains are made of heavy, dense materials that help absorb and block sound waves, reducing noise levels in your living space. Simply hang them over windows, doors, or walls to create a barrier against outside noise. If soundproof curtains are not within your budget, regular heavy blankets can also be a temporary alternative.
DIY Acoustic Panels
Consider creating your own DIY acoustic panels for a more hands-on approach to soundproofing. These panels are made from sound-absorbing materials such as foam, fabric, or fiberglass and can be easily constructed at home with basic tools and supplies. By mounting these panels on walls or ceilings, you can effectively reduce noise reverberations and improve the overall sound quality of a room. There are numerous online tutorials and guides available to help you design and build custom acoustic panels tailored to your specific needs and budget.
You can effectively reduce noise transmission and create a more peaceful living environment by implementing strategies such as sealing gaps and cracks, using soundproof curtains or blankets, rearranging furniture, and creating DIY acoustic panels. Whether you live in a noisy urban area or simply seek a quieter home, these budget-friendly soundproofing techniques offer practical and affordable ways to enhance the acoustics of your space.…
The Ultimate Guide to Home Painting
Are you tired of staring at the same dull walls day in and day out? Or maybe you’re moving into a new home and want to add your own personal touch through a fresh coat of paint. Whatever the reason, painting your home can be an exciting yet daunting task. But fear not because we’ve got you covered with our ultimate guide to home painting.
From choosing the right colors to prepping your surfaces, we’ll walk you through every step so that you can achieve professional-looking results without breaking a sweat. So grab your rollers, and let’s get started.
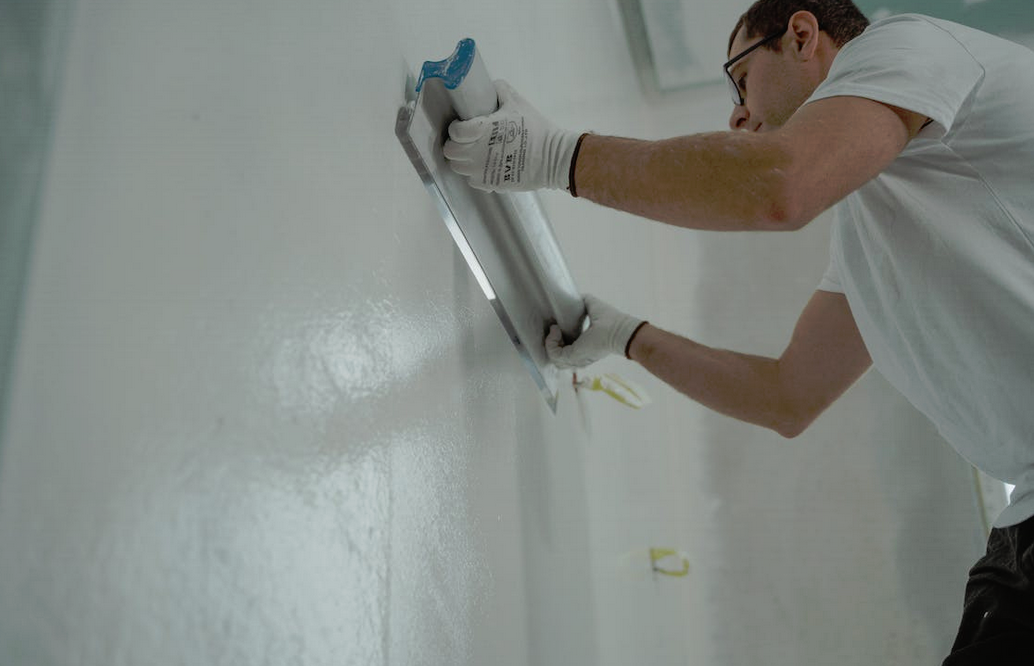
Preparing for the Paint Job
 Before you start painting, preparation is key to achieving a flawless finish. Begin by clearing the room of furniture or covering it with drop cloths to protect against accidental spills. Next, remove any wall fixtures, outlet covers, and switch plates.
Fill in holes and cracks with spackle, and sand the surface to create a smooth canvas for painting. Lastly, don’t forget to clean the walls thoroughly to remove dust and grease. A professional home painting company like Vancouver painters can typically take care of all these prep steps for you.
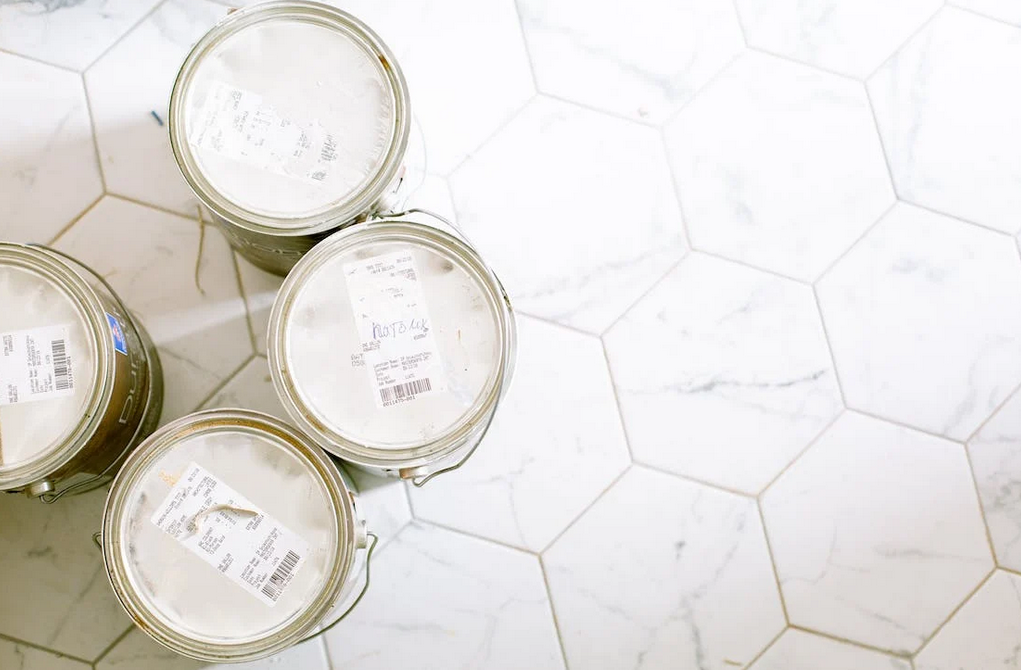
Choosing the Right Paint
Selecting the right paint color can be an overwhelming task. Start by considering the mood you want to create in each room. Light and neutral shades can make a space feel more open, while bold colors add vibrancy and personality. Use paint samples to test different hues on your walls before committing to a color. Additionally, consider the type of paint finish to achieve the desired look and durability.
Essential Painting Tools
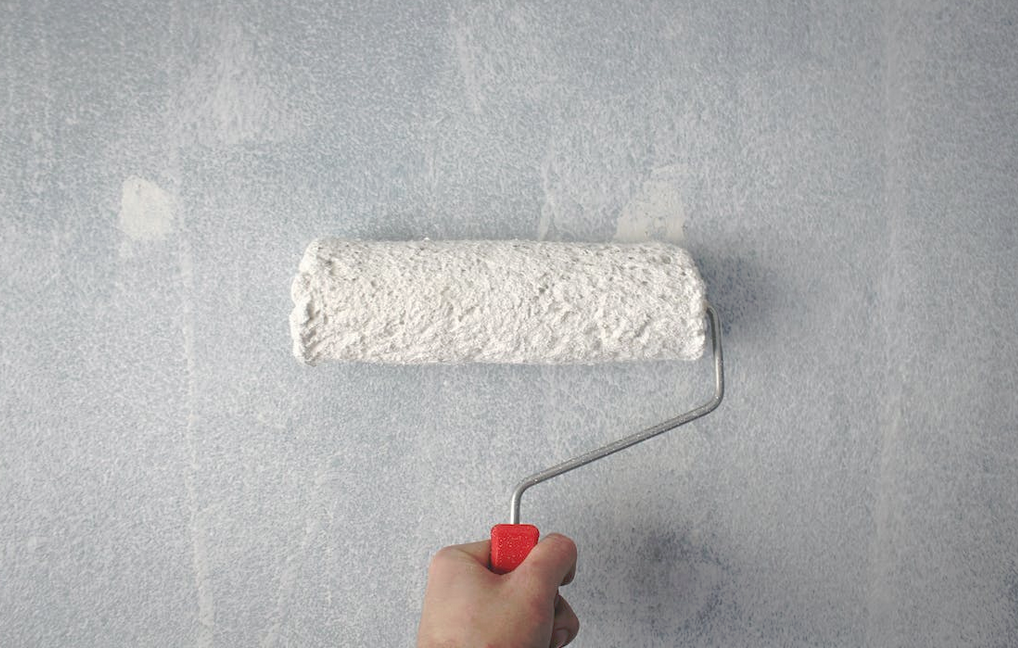 To ensure a smooth painting experience, gather the necessary tools. You’ll need paintbrushes, rollers, roller trays, paint sprayers (optional), painter’s tape, drop cloths, and a sturdy ladder.
Quality tools will make the process easier and produce better results. Don’t forget to wear old clothes or a painting smock to protect yourself from accidental paint splatters.
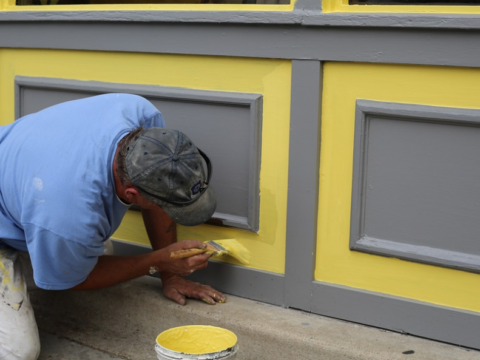
Mastering the Technique
Start by cutting in, using a brush to paint the edges and corners of the walls, before moving on to the larger areas with a roller. Work in small sections, maintaining a wet edge to avoid visible brush or roller marks. For a professional finish, apply two or more coats of paint, allowing sufficient drying time between each layer. Remember to remove the painter’s tape before the paint dries completely to prevent peeling.
Dealing with Common Challenges
 Home painting can come with its fair share of challenges. If you encounter drips or uneven texture, gently sand the affected area and touch it up with an extra coat of paint.
To fix paint bleed or smudges on trim or ceilings, use a small brush and steady hand to paint over the blemishes carefully. And if you accidentally paint over an area you didn’t intend to, don’t fret. A damp cloth or sponge can often remove fresh paint spills.
With these tips and techniques, you’ll be well on your way to creating a beautifully painted space that reflects your personal style. Remember, practice makes perfect, so don’t be afraid to experiment and let your creativity shine. Take your time, enjoy the process, and revel in the satisfaction of transforming your home one brushstroke at a time. Happy painting.…